

I felt overwhelmed when I first read Mike King’s article on vector embeddings. The concepts seemed complex, and implementing them for SEO was intimidating. But with Screaming Frog’s new features and Gus Pelogia’s excellent guide, I saw the potential to improve internal link building using this method.
Based on the two resources above, I decided to create a detailed, step-by-step guide to make this process more approachable, even for people unfamiliar with Python or vector embeddings.
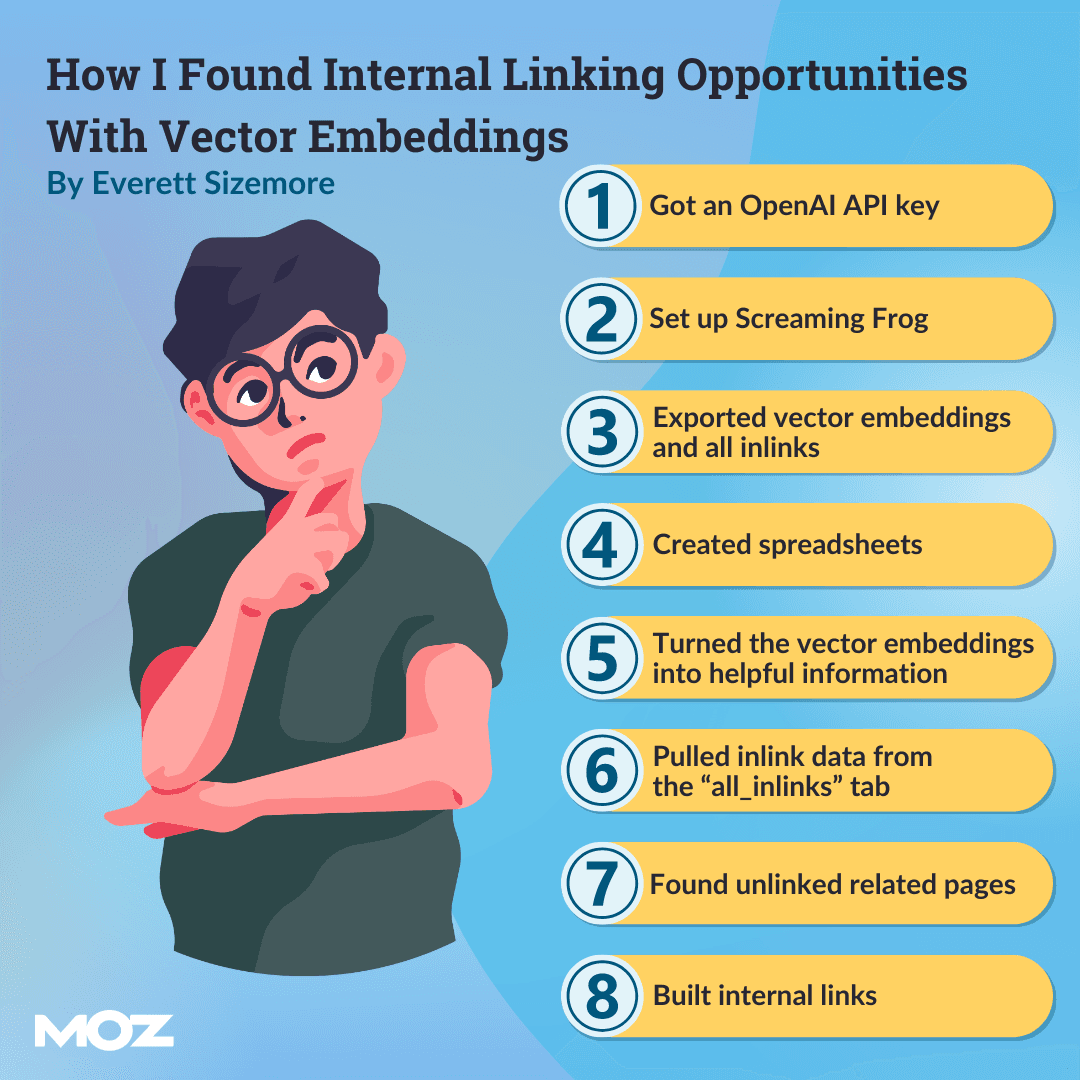
In this article, I’ll walk you through how I used vector embeddings to identify internal linking opportunities at scale so you can confidently apply these techniques to your SEO strategy.
What you’ll need to get started
To carry out this process, I used the following:
- Screaming Frog
- OpenAI API Key
- Google Sheets or Excel
By the end, I had a comprehensive spreadsheet that included:
- Every important URL from my site listed in column A (target URL)
- The URL of every page that links to the target URL (excluding navigation)
- URLs to the top 5 most closely related pages based on cosine similarity
- Opportunities where one or more of those 5 URLs are not linking to the target URL
This is the example I used in the screenshots below, and it will look something like this:
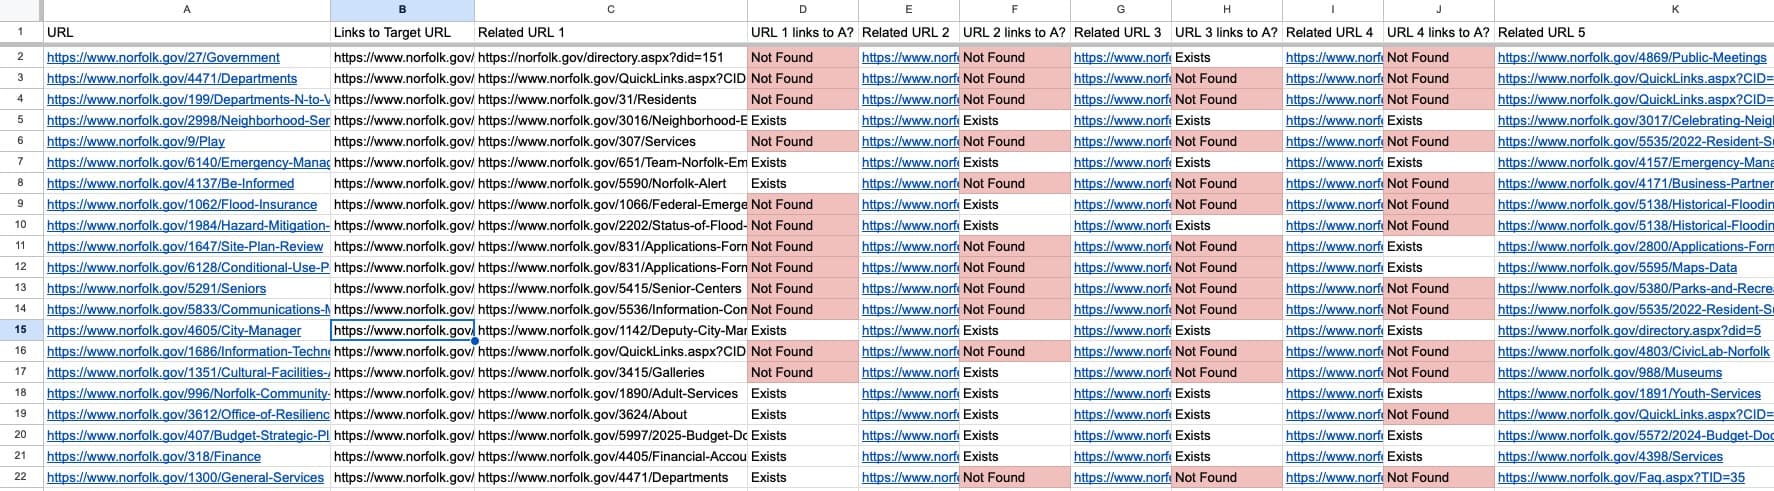
Pink cells indicate where the related page doesn’t link to the target page.
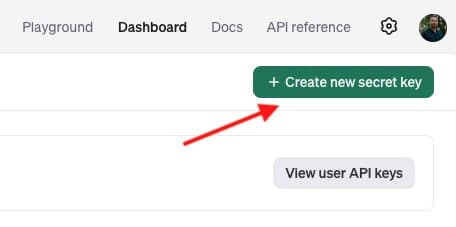
Step 1: Get an OpenAI API key
I started by heading over to OpenAI’s website, clicked the button to create a new secret key and copied that API key to use in Screaming Frog.
Step 2: Set up and Run Screaming Frog
For convenience, I have saved the Screaming Frog custom configuration profile. Download it here. In Screaming Frog, open a custom configuration file by using: Go to File > Open and select the .seospider file you want to load. Here is the explainer video.
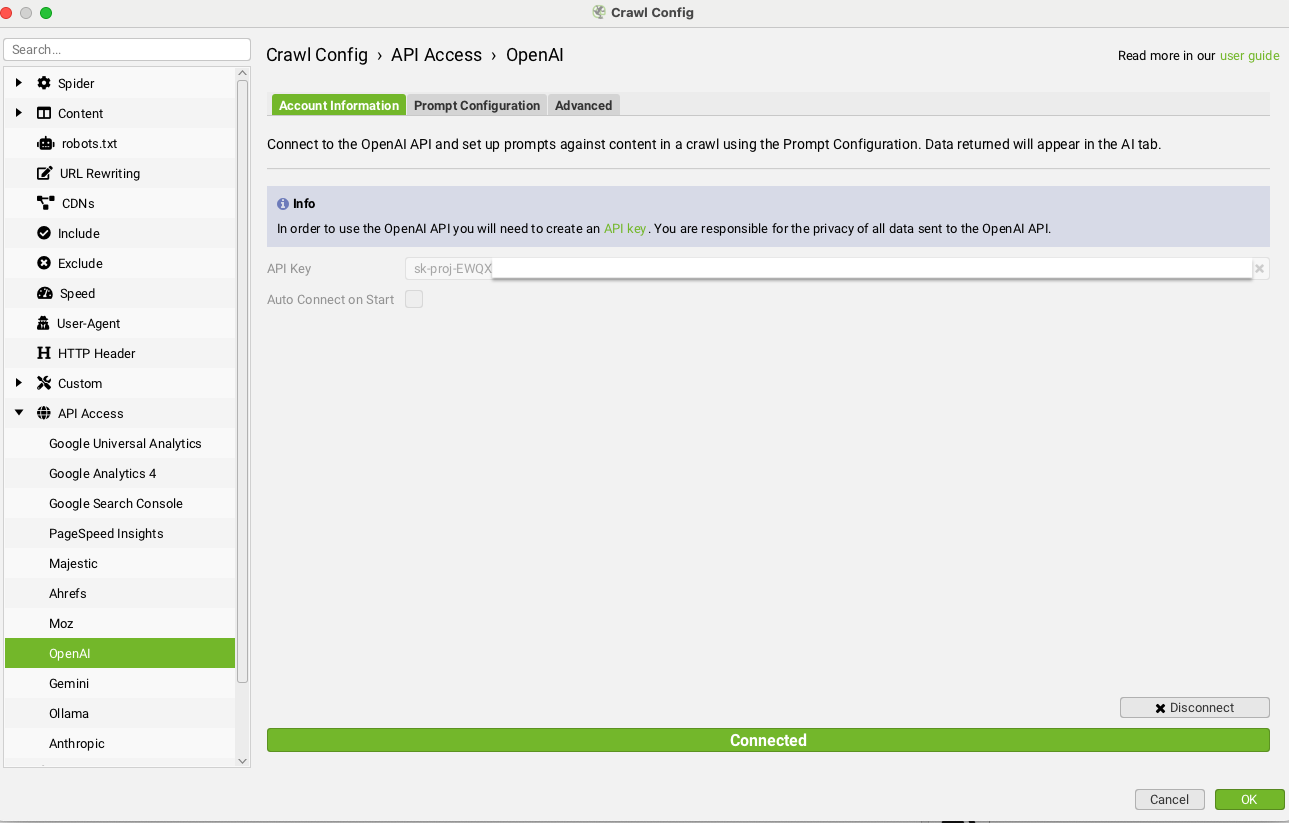
After loading the configuration file, I opened the API tab, selected OpenAI, and pasted in my API key.
Once connected, I switched over to the “Prompt Configuration” tab in the same window and clicked “+ Add from Library” to select the “Extract embeddings from page content” prompt.
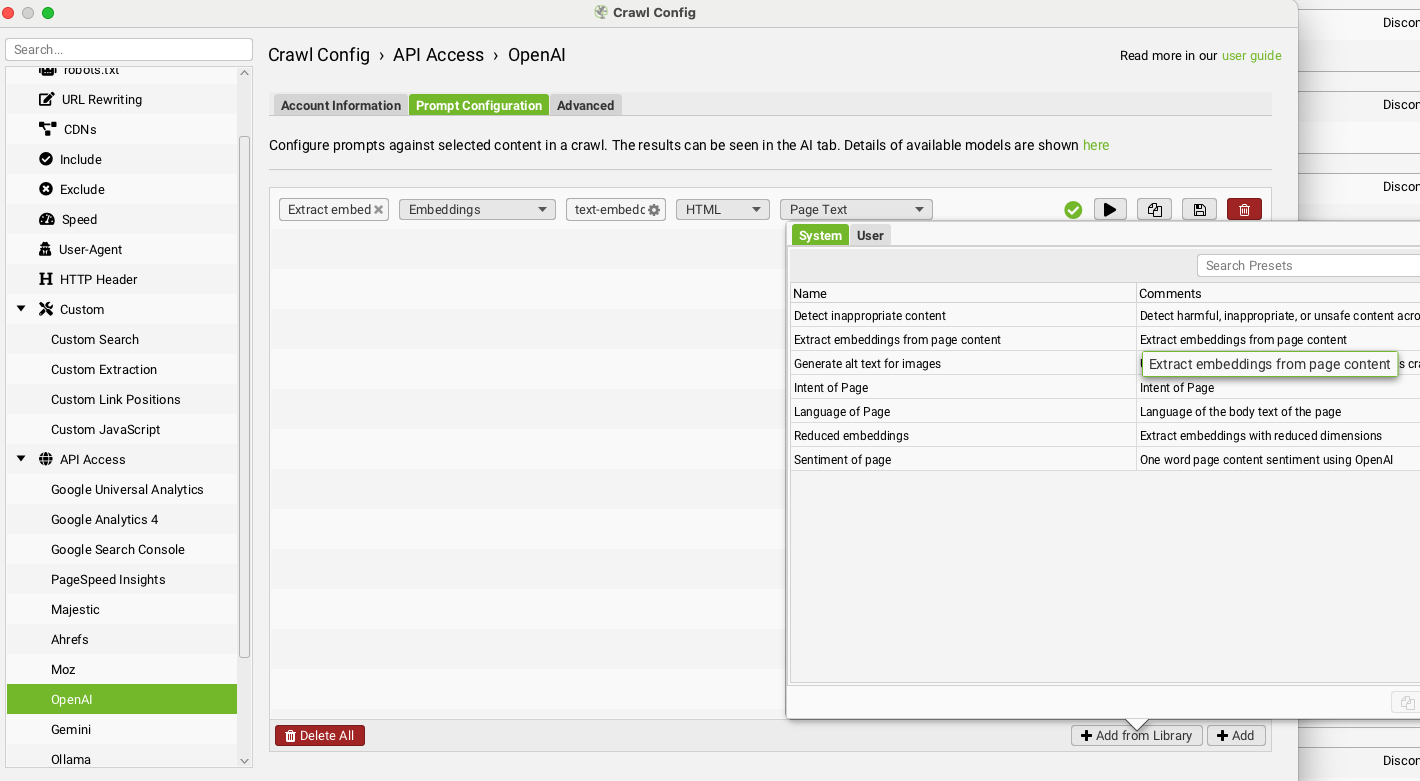
Note: The API Access feature above pulls embeddings into the API report. However, the script below requires the much smaller file generated by the Custom JavaScript function.
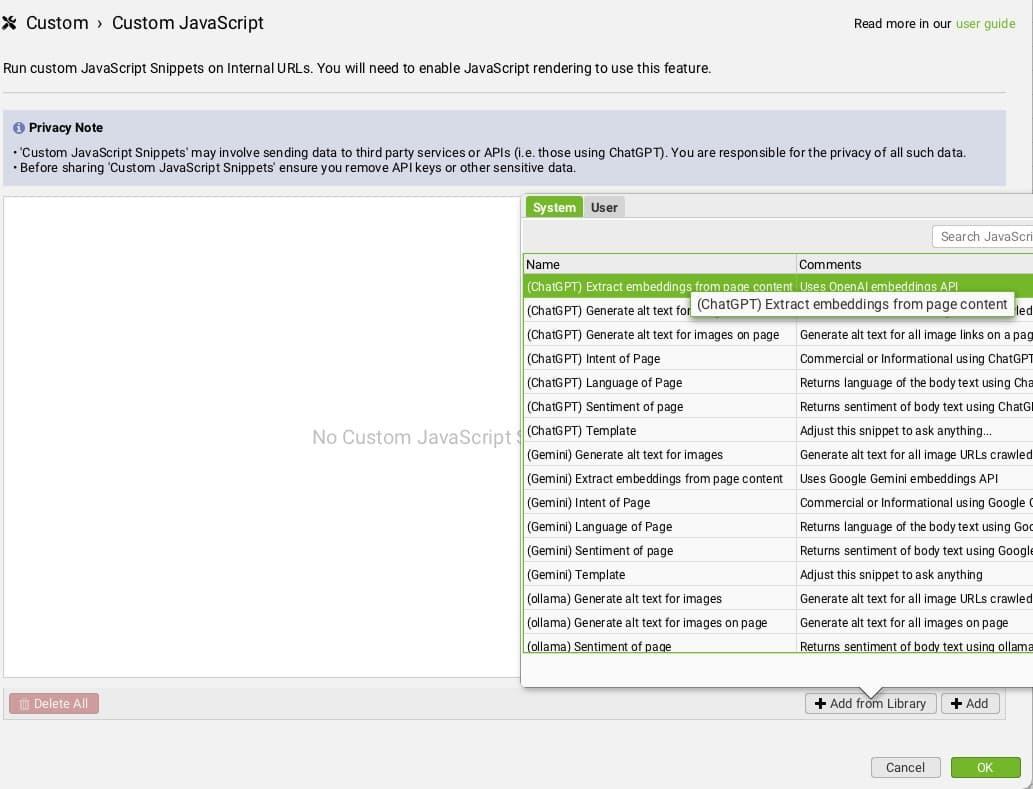
Next, I opened Screaming Frog and followed these steps:
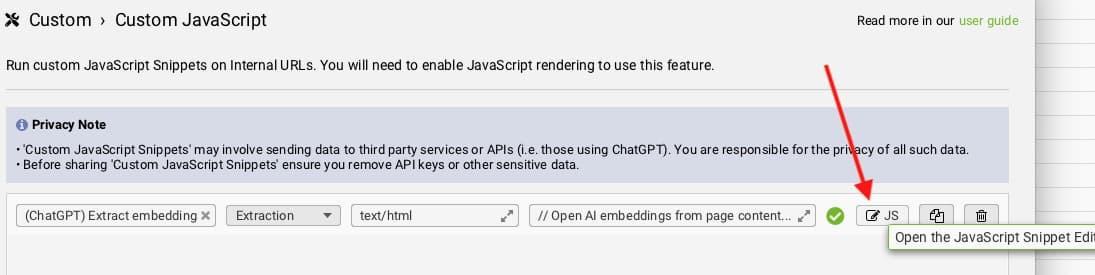
- Navigated to Configuration > Custom > Custom JavaScript.

- Clicked “Add from Library” and selected “(ChatGPT) Extract embeddings from page content.” This allowed Screaming Frog to extract the data needed for the internal link audit.
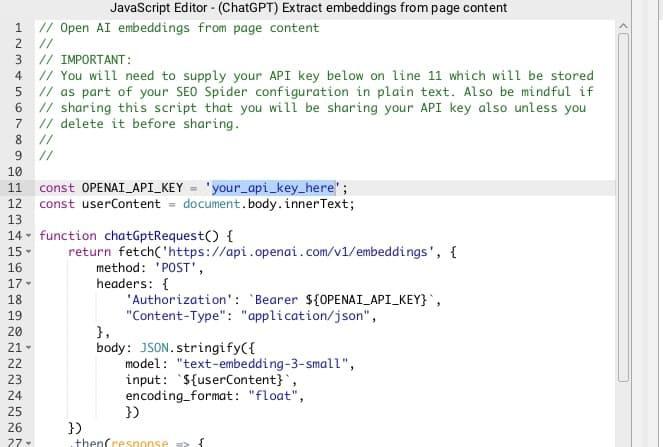
- I edited the custom JavaScript code to include my OpenAI API Key. Then, I pasted the API Key I generated in Step 1 into the appropriate section of the code. NOTE: You will have to do this even when using the custom configuration profile linked above.
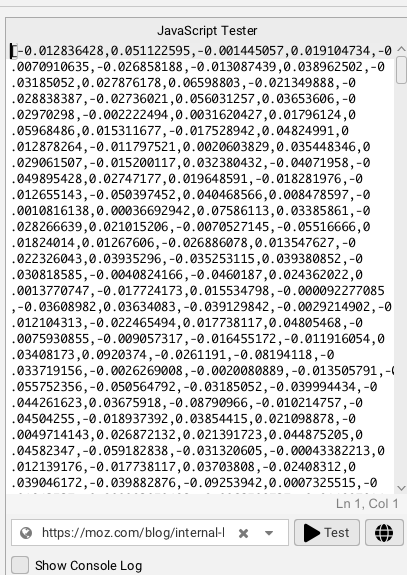
I ran a quick test on a URL from my target site. When I saw numbers populate in the “Custom Extraction” tab, I knew the setup was working correctly.
NOTE: Troubleshooting insufficient_quota errors for ChatGPT in your Screaming Frog results (provided by Tory Gray)
1: Ensure you have a paid ChatGPT account This process won't work without a paid account! - Log in and manage your paid subscription here.
2: Ensure you have appropriate ChatGPT API budget available - Log in to your OpenAI account here.
Set monthly API usage limits, as well as budget alerts here(scroll past Rate Limits section).
How much do you need? A one-time budget of $10 would roughly cover a small site with 100 pages and blog posts averaging 3200 words.
You can view existing API usage levels here (e.g. to ensure you aren't already over the limit).
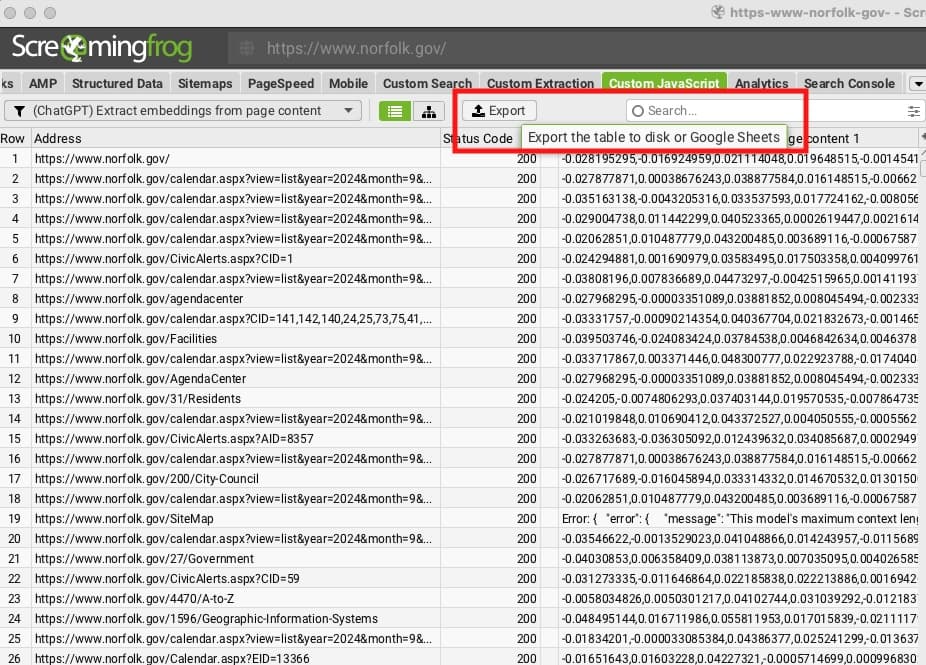
Step 3: Export vector embeddings and all inlinks
Export All Internal Links from Screaming Frog
- I saved the crawl once it was completed.
- I exported the “All Inlinks” data from Screaming Frog. This file contains every internal link on the site and can be quite large. For example, my file, all_inlinks.csv, was around 52 MB and represented 1,428 URLs.

Export vector embeddings from Screaming Frog
- I exported the Custom Javascript results where the vector embeddings are located.
Step 4: Run both files through the Cleanup & Formatting Script
I opened this convenient Python script on Google Collab, which was created by Britney Muller, and made a copy to use.
- I pressed the “Play button”
- Scrolled down to “Choose Files"
- Uploaded my first CSV file (all_inlinks.csv) and let it process.
- Uploaded my second file (custom_javascript_all.csv) when prompted.
- Accepted the Save File messages when they were done processing. You should get an XLSX version and a CSV version.
Note: The original version of this guide was about three times as long, comprised mostly of formatting and data cleanup. Britney’s script automates ALL of this, saving you several hours of tedious work.
Troubleshooting errors
Sometimes, an issue pops up that keeps the script from working. But don’t worry, clicking “Explain Error” will typically guide you to the fix.
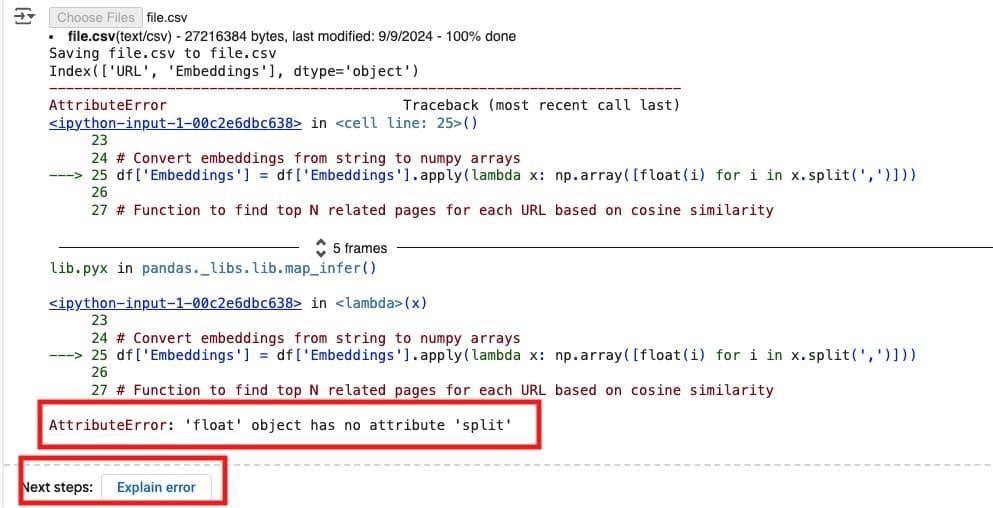
The explanation of the error helped me figure out that I needed to open the CSV file and look for irregularities in the Embeddings column. It turned out there was a blank cell.
Other examples of what might cause errors during this phase are:
- Extra columns
- The wrong file name
- The wrong column names
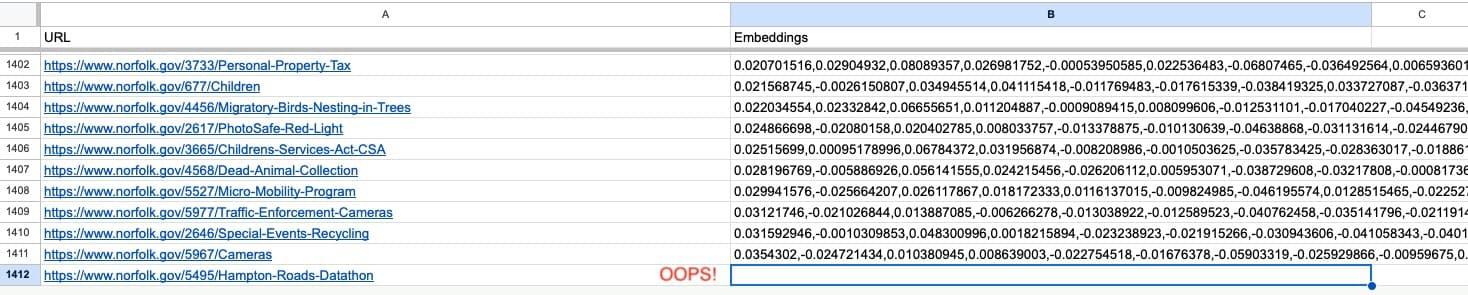
For example, I encountered a blank cell in the “Embeddings” column that caused an error. I simply deleted that row, exported the cleaned file as file.csv again, refreshed the Google Colab notebook, and retried.
Step 5: Import or Open the Saved File
I opened a new Google Sheet and imported the XLSX file. The script also outputs a CSV, but I prefer the XLSX version because it preserves conditional formatting.
If you’re working from Excel or another spreadsheet program on your computer, simply open the XLSX file.
Validate the data
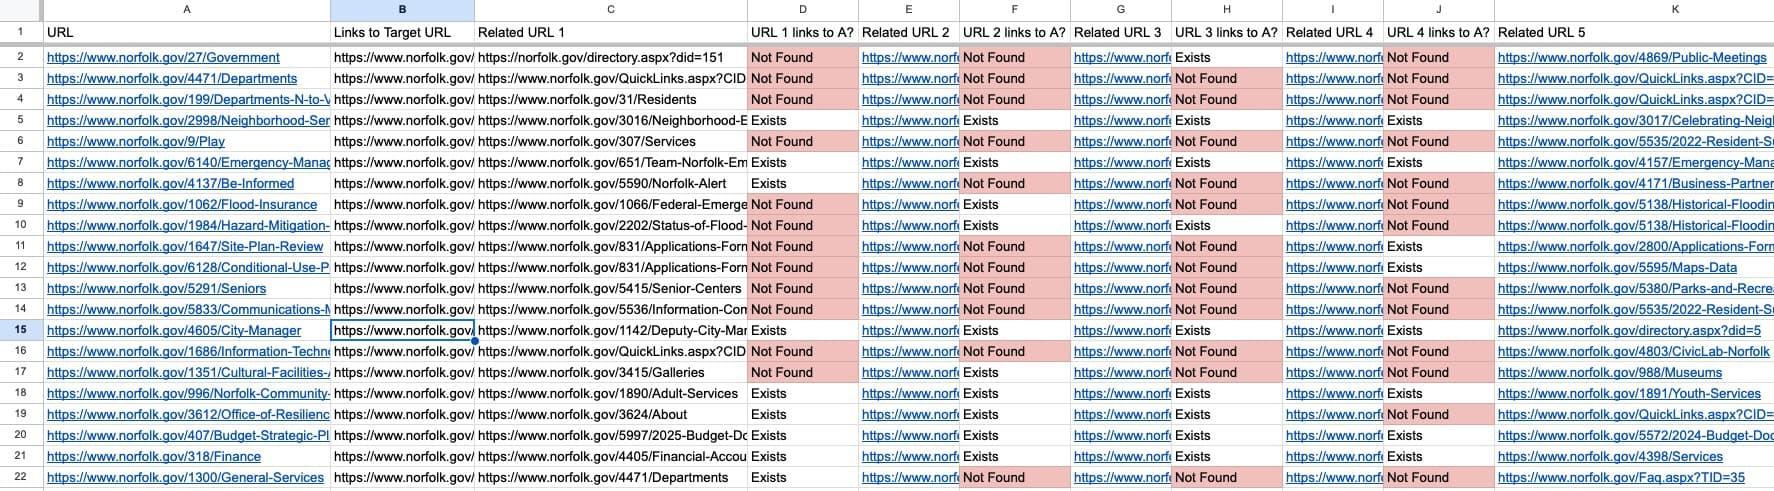
I double-checked a few entries manually to ensure everything was accurate. Now, I have a complete list that shows each target URL in column A, the top 5 related URLs, and whether those URLs are linking back to the target URL.
My final spreadsheet looked like this, with “Exists” or “Not Found” indicating whether each related URL was linking back to the target URL:
Step 6: Build internal links
Now comes the final and most actionable part — building those internal links.
Identify the opportunities: I used the pink cells as indicators of where internal links were missing. Each pink cell represented a related page that wasn’t linking to the target URL, even though it should.
Add the links: I went to each related page (from the pink cells) and edited the content to include a relevant internal link to the target URL. I made sure to use a descriptive anchor text that aligns with the content on the target page.
Prioritize: I started with the highest-priority pages first, such as those with the most traffic.
Concluding thoughts: Create a cohesive internal linking structure with vector embeddings
Take the time to build, analyze, and refine your internal link structure. This step-by-step guide transformed my internal linking process into a data-driven strategy with the power of vector embeddings. The effort will pay off in improved rankings, better user experience, and ultimately, more organic traffic. It also improves SEO performance by ensuring your most valuable pages are connected in a way that search engines and your users understand.
After running this process on a client’s site, I was surprised. I thought we’d done a great job at internal linking, but there were hundreds of opportunities we’d missed. And I don’t just mean that the keyword we want to link from appears on the page. I mean opportunities to link pages that search engines would see as highly relevant to each other. In doing so, I was able to disambiguate closely related concepts and fix a few unnoticed keyword cannibalization issues as well.
Links to templates and resources
- Example Spreadsheet (This is the example used in all of the screenshots above).
- Screaming Frog Custom Configuration File (saves time from the Screaming Frog setup recommendations)
- Python Script on Google Colab to clean up Screaming Frog export by Britney Muller
- Python Script on Google Colab to process vector embedding output from Screaming Frog by Gus Pelogia
- Vector Embeddings is All You Need: SEO Use Cases for Vectorizing the Web with Screaming Frog by Mike King
- How to use Screaming Frog + ChatGPT to map related pages at scale by Gus Pelogia
- Internal Linking Guide for SEO with Google Colab (Python) by Anna Pérez
- Google Colab for SEO: How to get started by John McAlpin
- What You Should Know About LLMs (Whiteboard Friday) by Robin Lord
- Intro to Python (Whiteboard Friday) by Britney Muller
- Intro to Python for AI (Hands-On Workshop) by Britney Muller
- Actionable AI For Marketers Course on Maven by Britney Muller
The author's views are entirely their own (excluding the unlikely event of hypnosis) and may not always reflect the views of Moz.