
If your business has dozens, or even hundreds, of locations on Google Maps, managing them all can quickly become overwhelming. Verification issues, unwanted edits, and policy compliance risks can appear out of nowhere, turning profile maintenance into a time-consuming headache.
There IS a right way to claim, verify, and manage Google Business Profiles (GBPs) at scale, to give you a streamlined process to maintain accuracy on your listings at all times, reduce errors when making updates, and keep control of every location efficiently – without letting them consume your week.
Set up your GBP management
Claim and Verify All Listings with a Domain Email
We all know how to claim and verify a Google listing, but many don’t realize that the account you use to claim and verify a listing really matters.
The email you use signals to Google that you are authorized to manage this business profile and can make the verification process and future edits easier. For that reason, always try to use a domain-level email for the brand when claiming or verifying a listing.
If your listings are already claimed, audit them for unwanted users and remove anyone unnecessary. You want as few users with direct access to the individual profiles as possible.
My recommended set-up is to have a domain email as the primary owner on all individual listings and then add another domain email as a backup owner. To give other users access to manage the listing, I recommend using business groups.
How to use GBP business groups
Business groups are Google’s solution for giving agency accounts the ability to streamline and more easily manage user access to listings. When you first set up an agency account, you will want to organize all the listings you have access to into business groups. You can organize these however you like, based on your business set-up.
For example, if you manage listings for multiple brands, you can organize the groups by brand. If they all belong to a single brand, you can organize them by location instead. For franchises where multiple locations may be owned by the same person, you can create a separate group for that franchisee and give them access to all their locations by adding them to the group. You also have the option to keep all locations in one group. Ultimately, it depends on your preference and how you want to delegate user access.
The main function of business groups is to simplify user access management. Instead of adding users directly to individual listings, you can give them access at the group level. This way, users can manage multiple listings at once without needing to be added to each one individually.
You can add as many users as you want to each group. Make sure those users are not sending any mass email blasts or making Google Maps edits with the email address connected to the group. If their user account is restricted by Google, it can cause all the locations in the group to be suspended.
To create a business group, click “Create group” next to the group dropdown in your GBP dashboard. You can name it whatever you want, but keep in mind that anyone added to the business group can see the name.
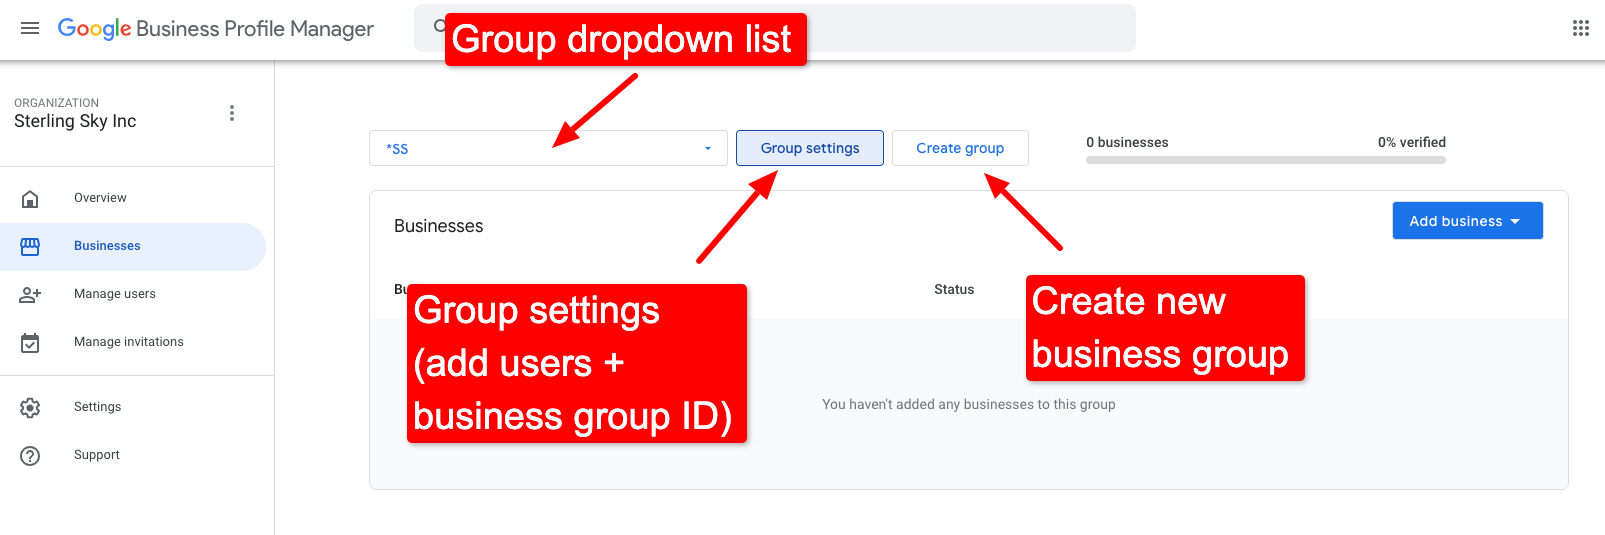
You can then add users to the business group by going into the group settings and clicking “Manage users”. This section is also where you will find the business group ID.
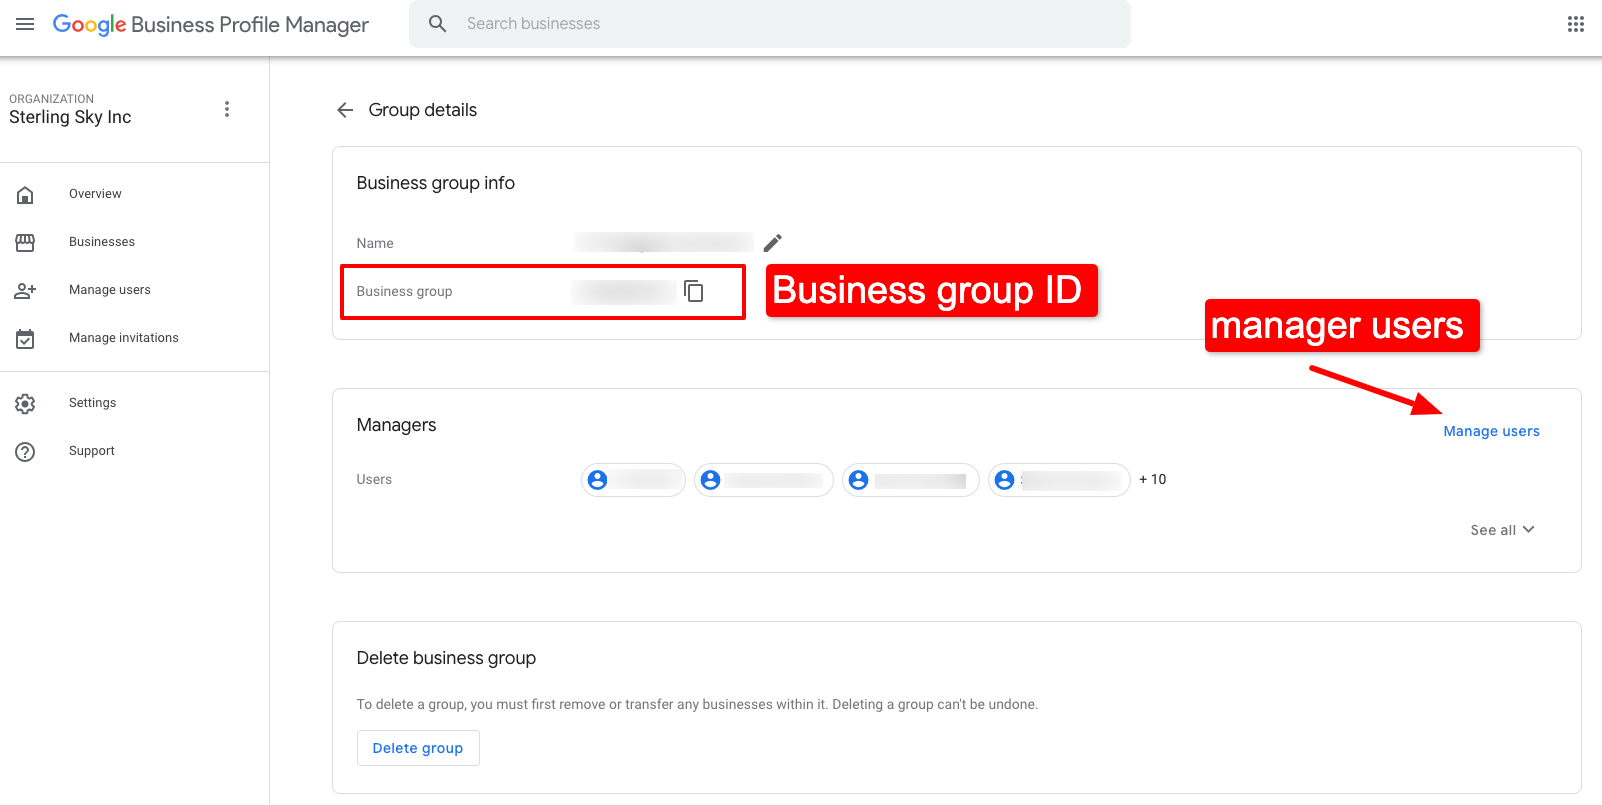
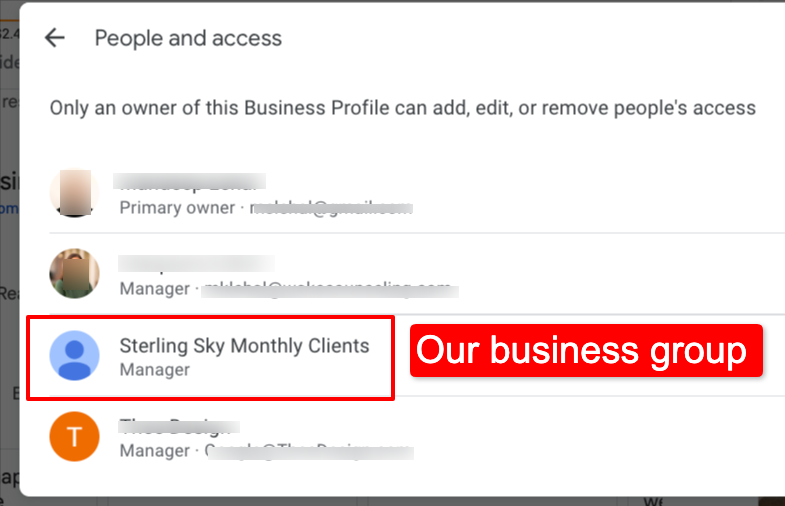
To add business listings to the group, add the business group ID as a user on the listing. Anyone you give access to manage the group will be able to manage each listing added into that group.
Bulk verify your locations
Bulk verification is available for businesses with 10 or more storefronts. In order to be eligible, you need to provide proof of the legitimacy of each address to Google. This can include storefront photos and business documents such as utility bills, business licenses or registration, leases, or government documents. Make sure your website also lists all your business locations and includes details about your services.
During the bulk verification process, Google will audit all your locations to make sure they comply with their guidelines, and they can even help verify unverified storefront locations manually.

After the account is bulk verified, and you get the green checkmark, you will be able to add new locations, and they will be verified automatically. Keep in mind, Google has the power to request verification of a business at any time, even if it is part of a bulk verified account, so it’s important to keep relevant documents on hand and maintain proper signage at each location.
Sterling Sky has a great guide on the bulk verification process. If your business is eligible to apply, check it out.
Avoid common GBP pitfalls
Monitor and respond to unwanted updates
Set up email alerts to track changes suggested by users or Google. This is a super underrated tip because it lets you catch unwanted edits quickly, so you can correct them fast. You need to ensure each location maintains accurate, up-to-date information across all listings at all times, and you may be surprised how many edits are made on Google Maps daily!

If you see the same edit being approved over and over, check the business website to make sure it's consistent with what you want to show on the listing. Google uses the business website as the main source of truth, so maintaining consistency on it is key to minimizing unwanted updates on your Google business listings.
API tools can help quickly fix incorrect edits to the profile automatically, but you ultimately need to correct the source of the problem. Too many API edits in a row can raise red flags with Google.
Also, make sure the information in the API matches what you want to show in GBP at all times. If it doesn’t, a tool with API access could be the culprit for your unwanted Google listings updates! You can check if there are any tools with API access to your profiles here.
Carefully use APIs for bulk edits
GBP API tools can be a dream for bulk edits, and I highly recommend using one (there are many, including Moz Local). Exercise caution when making mass edits because things can go south quickly.
I once helped a business on the GBP community forum that had all their locations go into reverification status after a category edit they made through an API tool. I’m talking dozens of profiles suddenly disappearing from Maps after one edit. In the end, they had to reverify each one of them individually. So be careful out there!
Do not push more than one major edit (name, website, phone number, address, category) at a time. Test API edits on a few individual listings first, before pushing to all profiles.
Managing multiple locations doesn’t have to be chaotic
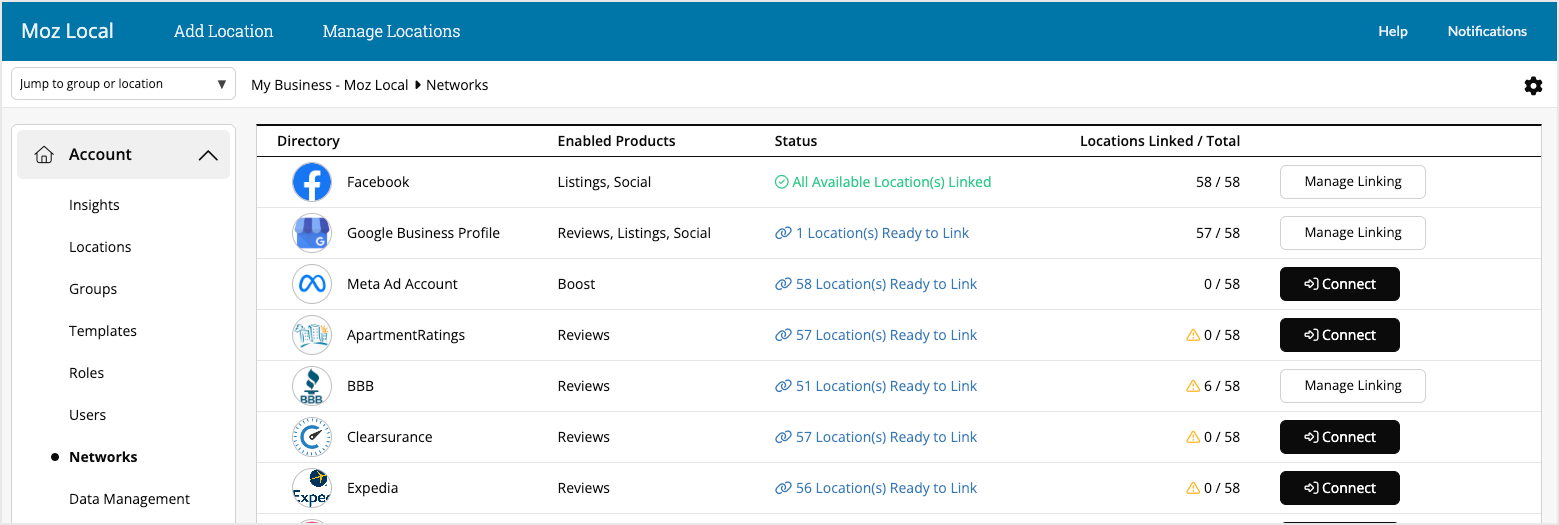
Moz Local brings all your locations into one dashboard
Ongoing Oversight to Prevent Suspensions
Ensure every location consistently follows Google’s guidelines, especially if they are storefront businesses with the address showing. If the signage isn’t visible in Street View, take a photo of your signage and post it to the Google Business profile. Capture as much of the surrounding area as possible, including street signs, neighboring businesses, monuments, etc.
Also, make sure your website reflects all of your locations. Maintain a location hub page on your brand website that lists every location with full NAPs (name, address, phone number). This should always match what’s on Google Maps, especially if you’re trying to get a listing reinstated.
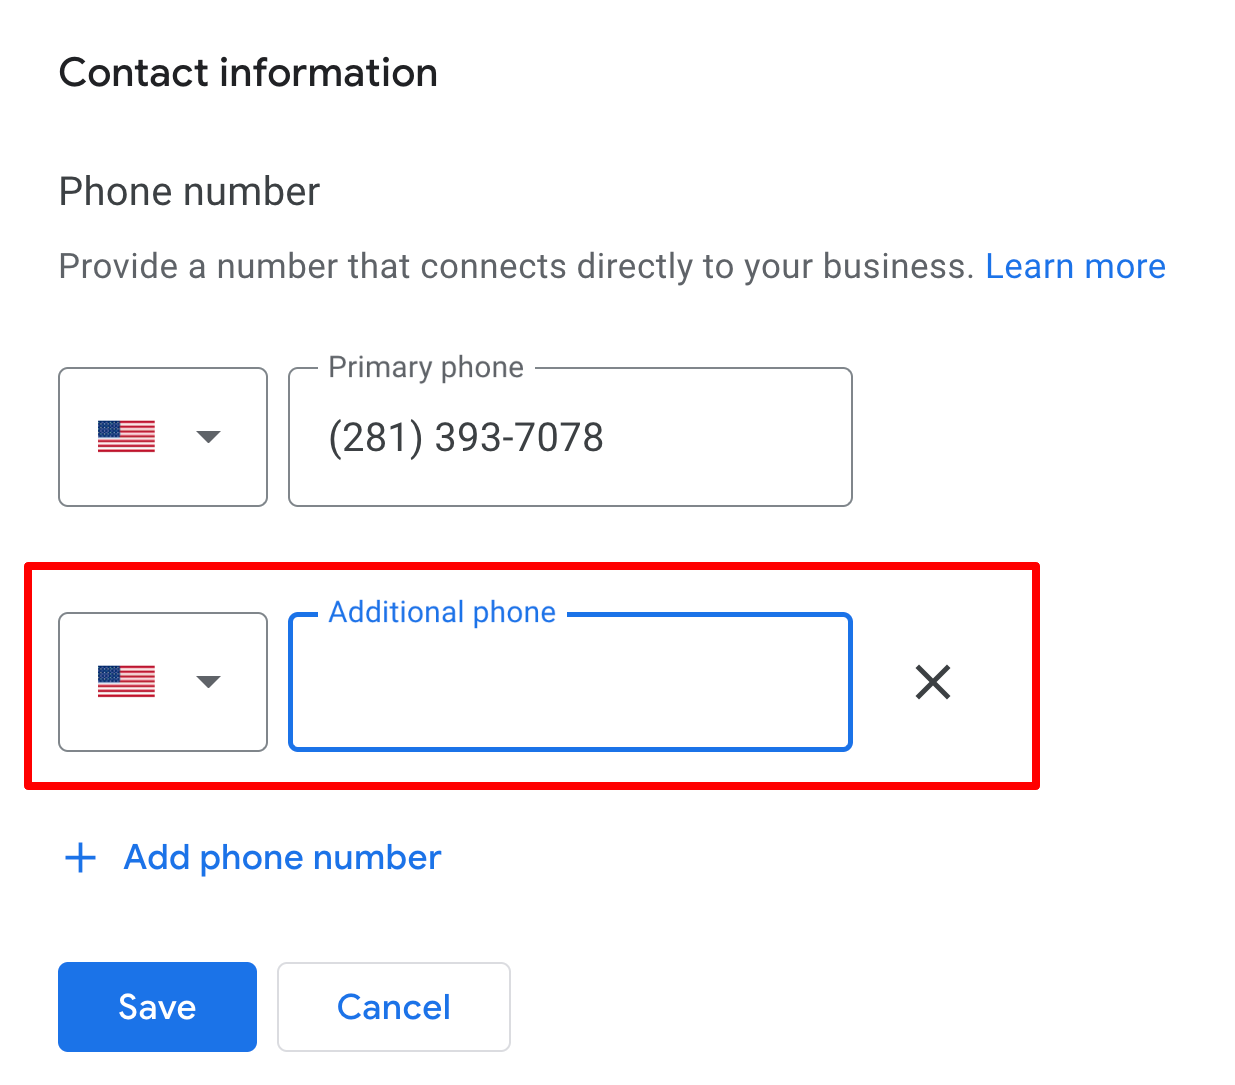
Pro Tip: Google requires that the phone number on the GBP listing match what’s on the website. Missing or inconsistent numbers can trigger a suspension or block an appeal.
If you’re using dedicated GBP call tracking (which you should!), this can pose a challenge for multi-location businesses. A workaround is to get a second unique number for each location (this can be a tracking number) and place it on the dedicated location page in the body content. Then, add that number to the additional phone number field on the GBP. This number won’t show on the live profile, so it won’t interfere with your GBP call tracking data.
Set your multi-location business up for GBP success!
Start by establishing a secure and well-organized Google Business Profile management system. This means verifying all locations correctly, assigning proper access through business groups, and setting up processes to monitor updates and prevent errors.
With this foundation in place, managing dozens or hundreds of locations becomes manageable, and you can spend more time focusing on executing location-specific local SEO strategies that can actually help grow the business.
The author's views are entirely their own (excluding the unlikely event of hypnosis) and may not always reflect the views of Moz.